Spacca


 | Questo tutorial è offerto da FORUMATTIVO.COM All rights reserved to forumattivo inc. |
Widget con immagine a rotazione
Assicurarsi di avere i Widget attivi.
Con questo Tutorial, saremo capaci di realizzare un Widget, con delle immagini a rotazione.
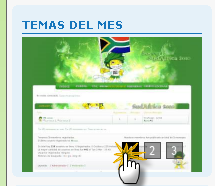
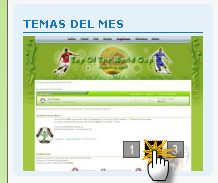
Sicuramente una cosa più amata dagli utenti, è questo:


Oggi, tramite questo Tutorial, scopriremo come realizzarla.
FASE 1: Creare un Widget
Mi raccomando, controllate che i Widget siano attivi.
FASE 2: Scopriamo il codice da incollare
Questo codice, va incollato come contenuto:
In questo codice, dovete sostituire l'URL delle Immagini, l'URL dei Temi e i Titoli.
Ora, andiamo a scoprire la parte fondamentale del codice, ovvero quella da modificare.
Una volta fatto tutto, salvate.
ATTENZIONE: Non mettete accenti o caratteri insoliti nei titoli, oppure il codice darà effetti indesiderati.
Base Tutorial: Forumattivo Spagnolo (Celina).
Ri-Creato e Postato da: DarkLeo.
Assicurarsi di avere i Widget attivi.
Con questo Tutorial, saremo capaci di realizzare un Widget, con delle immagini a rotazione.
Sicuramente una cosa più amata dagli utenti, è questo:


Oggi, tramite questo Tutorial, scopriremo come realizzarla.
FASE 1: Creare un Widget
Mi raccomando, controllate che i Widget siano attivi.
FASE 2: Scopriamo il codice da incollare
Questo codice, va incollato come contenuto:
In questo codice, dovete sostituire l'URL delle Immagini, l'URL dei Temi e i Titoli.
- Code: ----------Selezionare il contenuto
<style type="text/css">

.picshow { z-index:444; position:relative; background-color:#ffffff; width: 100%; height: 135px}

.picshow_main { position: relative; width: 180px; height: 135px}

.picshow_main .imgbig { filter: progid:dximagetransform.microsoft.wipe(gradientsize=1.0,wipestyle=4, motion=forward); width: 180px; height: 135px}

.picshow_change {position: absolute; text-align: left; bottom: 0px; height: 30px; right: 0px; left: 100px;}

.picshow_change img {width:15px; height: 15px}

.picshow_change a { border: 1px solid; display: block; float: left; margin-right: 5px;  -display: inline}

a.axx { border-color: #555}

a.axx:hover {border-color: #000}

a.axx img { filter: alpha(opacity=40); opacity: 0.4; -moz-opacity: 0.4}

a.axx:hover img {filter: alpha(opacity=100); opacity: 1.0; -moz-opacity: 1.0}

a.bxx { border-color: #000}

a.bxx:hover {border-color: #000}

img{

border:0px}

</style>

<SCRIPT language=javascript>

 var counts = 3;

 img1 = new Image();

 img1.src = 'http://URL DE LA 1RA IMAGEN.jpg';

 img2 = new Image();

 img2.src = 'http://URL DE LA 2NDA IMAGEN.jpg';

 img3 = new Image();

 img3.src = 'http://URL DE LA 3RA IMAGEN.jpg';


 var smallImg = new Array();

 smallImg[0] = 'https://i.servimg.com/u/f60/12/10/25/45/index_10.gif';

 smallImg[1] = 'https://i.servimg.com/u/f60/12/10/25/45/index_11.gif';

 smallImg[2] = 'https://i.servimg.com/u/f60/12/10/25/45/index_12.gif';


 url1 = 'http://URL DEL TEMA 1';

 url2 = 'http://URL DEL TEMA 2';

 url3 = 'http://URL DEL TEMA 3';


 alt1 = new Image();

 alt1.alt = 'TITULO DEL TEMA 1';

 alt2 = new Image();

 alt2.alt = 'TITULO DEL TEMA 2';

 alt3 = new Image();

 alt3.alt = 'TITULO DEL TEMA 3';

 var nn = 1;

 var key = 0;

 function change_img() {

  if (key == 0) {

  key = 1;

  } else if (document.all) {

  document.getElementById("pic").filters[0].Apply();

  document.getElementById("pic").filters[0].Play(duration = 2);

  }

  eval('document.getElementById("pic").src=img' + nn + '.src');

  eval('document.getElementById("url_theme").href=url' + nn);

  eval('document.getElementById("pic").alt=alt' + nn + '.alt');

  if (nn == 1) {

  document.getElementById("url_theme").target = "_blank";

  document.getElementById("url_theme").style.cursor = "pointer";

  } else {

  document.getElementById("url_theme").target = "_blank"

  document.getElementById("url_theme").style.cursor = "pointer"

  }


  for ( var i = 1; i <= counts; i++) {

  document.getElementById("xxjdjj" + i).className = 'axx';

  }

  document.getElementById("xxjdjj" + nn).className = 'bxx';

  nn++;

  if (nn > counts) {

  nn = 1;

  }

  tt = setTimeout('change_img()', 7000);

 }

 function changeimg(n) {

  nn = n;

  window.clearInterval(tt);

  change_img();

 }

 function ImageShow() {

  document.write('<div class="picshow_main">');

  document.write('<div><a id="url_theme"><img id="pic" class="imgbig" /></a></div>');

  document.write('<div class="picshow_change">');

  for ( var i = 0; i < counts; i++) {

  document.write('<a href="javascript:changeimg(' + (i + 1)

    + ');" id="xxjdjj' + (i + 1)

    + '" class="axx" target="_self"><img src="' + smallImg[i]

    + '"></a>');

  }

  document.write('</div></div>');

  change_img();

 }

</SCRIPT>

<SCRIPT language="javascript" type="text/javascript">

 ImageShow();

</SCRIPT>
Ora, andiamo a scoprire la parte fondamentale del codice, ovvero quella da modificare.
<style type="text/css">
.picshow { z-index:444; position:relative; background-color:#ffffff; width: 100%; height: 135px}
.picshow_main { position: relative; width: 180px; height: 135px}
.picshow_main .imgbig { filter: progid:dximagetransform.microsoft.wipe(gradientsize=1.0,wipestyle=4, motion=forward); width: 180px; height: 135px}
.picshow_change {position: absolute; text-align: left; bottom: 0px; height: 30px; right: 0px; left: 100px;}
.picshow_change img {width:15px; height: 15px}
.picshow_change a { border: 1px solid; display: block; float: left; margin-right: 5px; -display: inline}
a.axx { border-color: #555}
a.axx:hover {border-color: #000}
a.axx img { filter: alpha(opacity=40); opacity: 0.4; -moz-opacity: 0.4}
a.axx:hover img {filter: alpha(opacity=100); opacity: 1.0; -moz-opacity: 1.0}
a.bxx { border-color: #000}
a.bxx:hover {border-color: #000}
img{
border:0px}
</style>
<SCRIPT language=javascript>
var counts = 3;
img1 = new Image();
img1.src = 'http://URL DELL'IMMAGINE 1.jpg';
img2 = new Image();
img2.src = 'http://URL DELL'IMMAGINE 2.jpg';
img3 = new Image();
img3.src = 'http://URL DELL'IMMAGINE 3.jpg';
var smallImg = new Array();
smallImg[0] = 'https://i.servimg.com/u/f60/12/10/25/45/index_10.gif';
smallImg[1] = 'https://i.servimg.com/u/f60/12/10/25/45/index_11.gif';
smallImg[2] = 'https://i.servimg.com/u/f60/12/10/25/45/index_12.gif';
url1 = 'http://URL DESTINAZIONE 1';
url2 = 'http://URL DESTINAZIONE 2';
url3 = 'http://URL DESTINAZIONE 3';
alt1 = new Image();
alt1.alt = 'TITOLO 1';
alt2 = new Image();
alt2.alt = 'TITOLO 2';
alt3 = new Image();
alt3.alt = 'TITOLO 3';
Una volta fatto tutto, salvate.
ATTENZIONE: Non mettete accenti o caratteri insoliti nei titoli, oppure il codice darà effetti indesiderati.
Base Tutorial: Forumattivo Spagnolo (Celina).
Ri-Creato e Postato da: DarkLeo.


 Pubblicato da:
 Social